If you’ve just spent a good chunk of money on your first mountain bike, then it’s smart to also make an investment now in a basic maintenance kit. Good tools are essential for taking good care of your bike and will pay for themselves in the long run. Quality tools will easily outlast your bike’s lifetime, so you’re guaranteed to get your money’s worth from them.
Remember, you can always start small and slowly grow your mountain bike maintenance kit over time as you need new tools. When special situations do arise, it may even make more sense to take your mountain bike into a local bike shop and have them perform the repair instead of buying the tool yourself.
Because bike cleaning is such an in-depth topic in its own right, I won’t be covering it here. This article will focus on the items that you’ll use on a frequent basis to keep your bike riding smoothly.
Bare Essentials Mountain Bike Maintenance Toolkit
If you’re just starting out with your first bike then there’s a good chance that you spent most of your available funds getting the best bike within your budget.
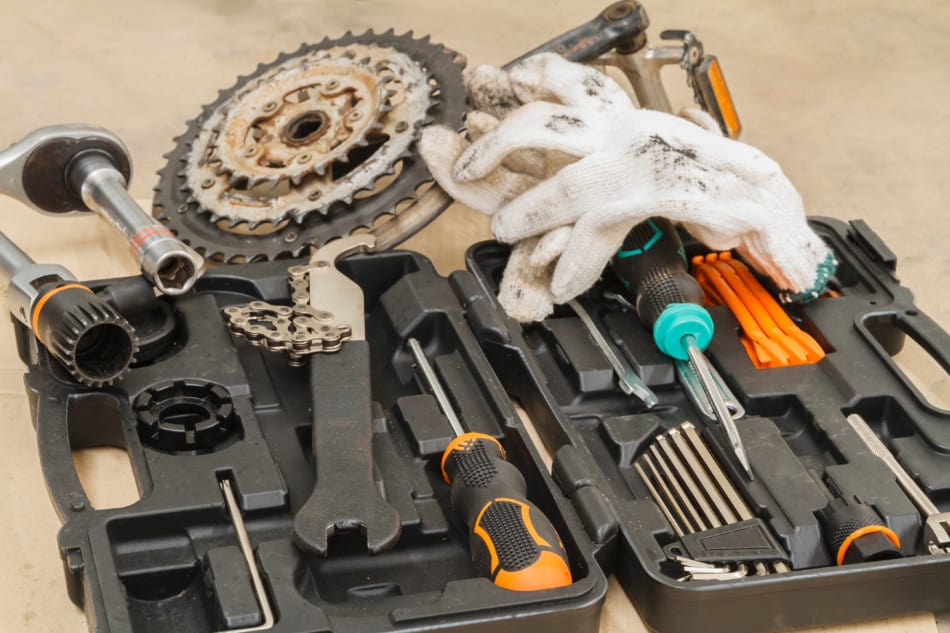
While you may not have much budget leftover, these are the bare essentials that every mountain biker should have in their starter maintenance toolkit.
These can all be obtained for a small initial cost, and then slowly expand the toolkit as new items are needed.
#1 Multi-tool
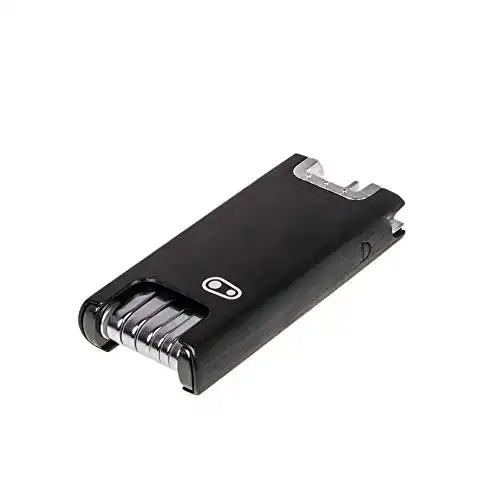
- Magnetic case keeps storage of the F Series easy and also supplements the handle for more leverage
- Includes chain tool 8/9/10/11/12 speed compatible
- Equipped with - hex wrenches: 2, 2.5, 3, 4, 5, 6, 8, screwdrivers: Phillips #2, flathead #1, spoke wrenches: 0, 1, 2, 3 and Torx t-25
- Fitted with a bottle opener for that after ride reward!
A good multi-tool is one of the most convenient and cost-effective tools for a mountain biker to own. By combining several tools into one, you can quickly fill many gaps in a starting toolkit. This also makes them extremely cost effective compared to buying each tool individually.
While generic multi-tools like Leatherman’s are still good options, bike-specific ones are an even better choice. This ensures that each and every item in the
Therefore, cutting down weight and cost. While I’m sure you could find a way to use the file that comes on most general multi-tools, they won’t come in handy very often on a bike!
Generic multi-tools are often large in size as well, so they’re not as ideal for transporting on your bike. Whereas, multi-tools specific to bikes are compact enough to carry on rides and use at home.
While they’re amazing at packing a lot of tools into a small package, they aren’t ideal as primary tools for long-term maintenance. Their smaller form factor can make them tricky to get into tight spaces, and their short length doesn’t give you a lot of leverage for loosening or tightening stubborn bolts.
Even with these shortcomings, I still think it’s the best item for getting your kit started. A good
While there are lots of good options out there, my all-time favorite multi-tool is the Crankbrothers F15. As the name implies, it comes with 15 extremely useful bike maintenance tools.
- 7 hex wrenches (#2, 2.5, 3, 4, 5, 6, 8)
- 4 spoke wrench (#0, 1, 2, 3)
- 2 screwdrivers (Phillips #2, Flat #1)
- 1 torx wrench (T25)
- 1 chain tool (8-12 speed compatible)
This all comes packaged up in a beautiful little magnetic case that also acts as a bottle opener. So, make that 16 tools for “maintenance” 😉
You can find more details on the Crankbrothers F15
- Magnetic case keeps storage of the F Series easy and also supplements the handle for more leverage
- Includes chain tool 8/9/10/11/12 speed compatible
- Equipped with - hex wrenches: 2, 2.5, 3, 4, 5, 6, 8, screwdrivers: Phillips #2, flathead #1, spoke wrenches: 0, 1, 2, 3 and Torx t-25
- Fitted with a bottle opener for that after ride reward!
#2 Mini pump
This pump is specifically designed to inflate high volume bike tires as the fat barrel moves more air per stroke. The SmartHead Threadlock works with both Presta and Schrader valves, and its aluminum construction keeps it lightweight.
While a good
Yes, you could do it but it’s wildly inefficient and time-consuming. Worse yet, you certainly don’t want to get a flat out on the trail and not have a way to get your tires filled back up.
While a mini pump isn’t the most efficient style of pump, it is compact enough to carry with you on the trail and use at home. It’s perfect for topping off your tires before a ride or filling them after an emergency tire patch on the trail.
I’m not a big fan of CO2 cartridges because they create unnecessary waste. You can instead buy a good mini pump once and be set for years. Also, once you run out of CO2 cartridges on the trail you’re out of luck for inflating your tire after a flat. By comparison, mini pumps only run out when your energy to pump them does!
There are plenty of options when it comes to mini pumps, but the one that I like is the Topeak Race Rocket MT. It’s small, well-built, lightweight, and has a flexible hose that makes inflating tires easier. It’s wider barrel allows you to get more air volume per pump i.e. pump up your tire faster 🙂
The Topeak Race Rocket MT is also compatible with Presta and Schrader valves so that you don’t have to worry about compatibility issues. You can choose to store it in a backpack or use the included side mount bracket to stick it on your frame.
You can find more details and a link for where to purchase the Topeak Race Rocket MT mini pump at this link over on my recommended maintenance gear page.
This pump is specifically designed to inflate high volume bike tires as the fat barrel moves more air per stroke. The SmartHead Threadlock works with both Presta and Schrader valves, and its aluminum construction keeps it lightweight.
#3 Patch kit
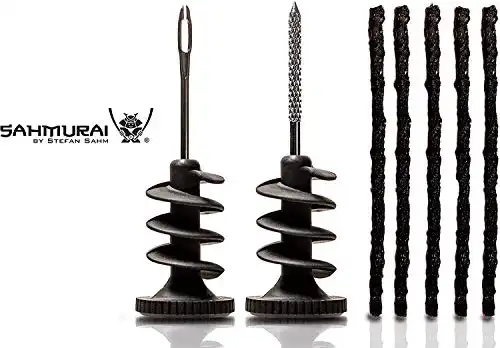
The Sahmurai SWORD (Super Wicked Original Repair Device) is a tubeless mountain bike repair kit that conveniently and safely stores in the handlebars of your mountain bike. The kit includes a fork tool, a reamer tool and 5 plugs in a single packaging tube. The plugs can repair holes from 3.5mm to 5mm in size.
Once you’ve got an easy way to get your tire on and off the bike (tire levers), then you’ll need to have a way to patch them. Thanks to the rise of tubeless tires, the number of flats for mountain bikers has gone down.
While the tire sealant in tubeless setups will fix many minor punctures it won’t be able to handle larger ones.
For these situations, it makes sense to have something on hand to address your flat. Yes, you can always just replace the entire tire but that’s far from cost-effective. It’s also not an option that’s immediately available if you get a flat out on the trail.
The best starting point will be a tubeless-specific patch kit. These act to help plug the hole, while allowing the sealant to escape and help seal around the edges.
They’re very small, lightweight, and simpler than removing the tire to install a tube. One of the best on the market is the Sahmurai S.W.O.R.D patch kit.
To save you some time searching, there’s a link below to the Sahmurai patch kit.
The Sahmurai SWORD (Super Wicked Original Repair Device) is a tubeless mountain bike repair kit that conveniently and safely stores in the handlebars of your mountain bike. The kit includes a fork tool, a reamer tool and 5 plugs in a single packaging tube. The plugs can repair holes from 3.5mm to 5mm in size.
Another important alternative is to highly consider is carrying a spare tube with you. While plug kits can solve the majority of issues, they won’t solve every single situation.
In these scenarios, you need to remove the valve stem, insert a tube, pump it up, and repair or replace the tire when you get home.
#4 Tire levers
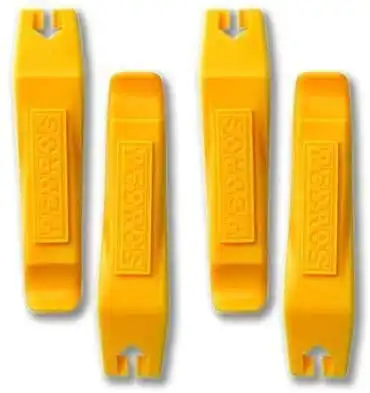
The ergonomic shape of these tire levers and dual spoke makes removal of even the tightest tires a simple task. Their molded box construction ensures that they are both lightweight and durable.
While they may be one of the simplest bike tools out there, tire levers can save you a lot of time and frustration! Especially when using tubeless tires, getting a tire properly seated onto the rim can be a tricky process.
Sure, you can try to fumble around with your hands alone but a tire lever can make the process far easier and help spare you the headache.
I like Pedro’s tire levers for their ergonomic grip and ease of store thanks to the fact that they clip together. In general, tire levers are a very inexpensive tool so you won’t find the cost to be a big differentiator amongst them.
Pedro’s are slightly wider and have a sturdier construction which makes them more comfortable in the hand and more durable.
Click here to find Pedro’s tire levers.
That wraps up my list of the bare essentials mountain bike maintenance toolkit! While these items are enough to keep your bolts tight and tires full of air, they won’t be able to cover all repair situations.
Additionally, the
Upgraded Essential Mountain Bike Maintenance Toolkit
Once you’ve got a basic maintenance toolkit in place and some budget, it makes sense to invest in a few additional tools. Some will simply make jobs far easier than your
Add these tools as additions to ones previously covered, not as replacements for them.
#5 Hex wrenches
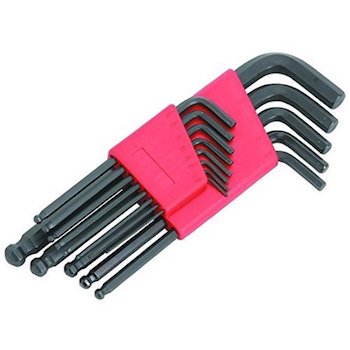
While your
Dedicated hex wrench sets are surprisingly affordable, and can make life so much easier! Their longer handles allow you to get into tight spots easier, and also apply more torque to stubborn bolts.
Hex wrenches come in a variety of options. From T and L handles to 3-ways hex wrenches there are plenty of options. T-handle sets are the most ergonomic but can get pricey. The same goes for 3-way hex wrenches. L-handle hex wrenches give you the best blend of the cost-to-benefit ratio for the three varieties.
You will spend so much time using hex wrenches on your bike, so make sure to get a decent set made of good hard steel. Cheap sets are made of softer steel that can lead to them wearing out faster or even bending. Regardless of which L-style hex wrench set you choose, make sure that they’re metric.
If you don’t mind spending a little more money for better ergonomics, then I’d recommend looking at Park Tool’s hex wrench set. You can find them by clicking here (link to Amazon.com).
#6 Floor pump
Half air compressor - Half pump, the JoeBlow Booster pump just made it easier to install tubeless tires! This pump has an integrated aluminum air chamber that stores an air to quickly fill your tire and ensure the proper installation on a tubeless rim, just like a shop compressor.
If you can only get one pump, then a mini pump is the way to go. However, when it comes to frequent use or for seating a tubeless tire then you’re going to want a proper
When it comes to buying a good floor pump it’s worth buying one that’s built for mountain bikes. General use bike pumps will of course work, but they lack a few features that are specific to mountain biking.
Because mountain bike run such low tire pressures compared to road bikes, it’s important that the air pressure gauges on pumps are accurate at these lower levels.
With so many mountain bikers running tubeless tires these days, it’s also incredibly helpful that the pump has a dedicated air chamber for delivering large quantities of air at once. This makes it far easier to seat your tire during installation.
The Topeak Joe Booster
Half air compressor - Half pump, the JoeBlow Booster pump just made it easier to install tubeless tires! This pump has an integrated aluminum air chamber that stores an air to quickly fill your tire and ensure the proper installation on a tubeless rim, just like a shop compressor.
#7 Needle nose pliers
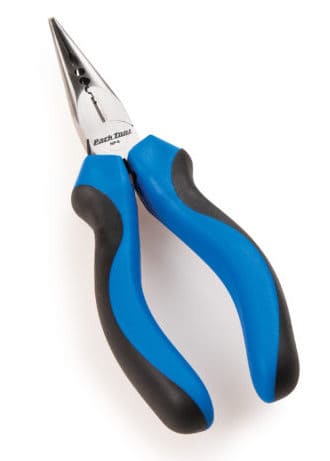
Needle nose pliers may be one of the most underrated tools for mountain bike maintenance! A good set of needle nose pliers has so many uses. From cutting to crimping, and acting as a plier, they’re like a hidden
Like hex wrenches, cheaper versions just don’t cut the job – literally! Subpar needle nose pliers will quickly wear down from cutting shift cables and probably won’t be great for crimping. For these reasons, it makes sense to invest in a pair of high-quality needle nose pliers.
While you may already own a decent pair of needle nose pliers, it’s unlikely that they have built-in crimpers. For this reason, I recommend buying a bike-specific pair like the one made by Park Tool. It’s manufactured from tough steel to ensure that its cutting edge stays sharp for years, and has 5 crimping or grasping areas. You can find it here.
#8 Torx wrench
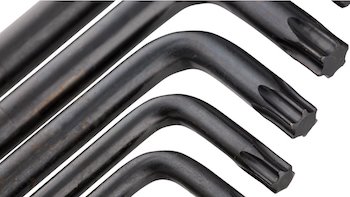
While any good bike
Getting a T25 alone will probably enough to satisfy most situations. Like hex wrenches, cheap varieties use soft steel that is prone to wearing down. Invest once and you’ll get fantastic use out of a high-quality torx wrench.
If you only get one, make it a T25 torx wrench. However, if you’ve got more budget and want to invest now, then I’d recommend taking a look at the set from Park Tool. Their set is made from industrial grade steel and covers all of the necessary sizes. Their ergonomic handle ends make them very comfortable to hold and use. You can find them here.
#9 Adjustable wrench
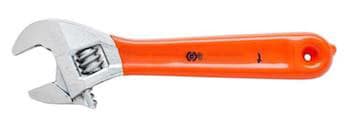
Along with the needle nose plier and hex wrench, this is one of the items that you may already have in your standard toolkit. Adjustable wrenches are helpful for a variety of needs in mountain bike maintenance. As long as you have a set that can go decently wide (larger than 30 mm) then you’re good to go.
Decent adjustable wrenches also come with markings that allow you to use them as a crude caliper for measurements. Having a rubber coated handle is also helpful for acting as a hammer but not required.
Aside from the adjustable wrench, you can see that most of the items in the upgraded version of the essential maintenance tools kits are improved version of what you can find on the
The same goes for a great
These items will be enough to get you started, and as situations come up you can choose to add new tools to your kit as needed. Some of these tools will be essentially required to complete the job, while others offer a huge upgrade for convenience.
Situational Mountain Bike Maintenance Tools
This list isn’t meant to include every single mountain bike tool out there but the ones that are more common. Look to invest in these as needed for repairs.
These are tools that you should be able to use many times and get a good return on your investment. For the truly rare edge cases, I’d recommend just having your local bike shop handle the repair.
Repair stand
If you plan on doing a lot of your own bike maintenance then one of the first items that I’d recommend looking into after your essential kit is a
They also elevate the bike so that you don’t need to spend a lot of time bent over! Elevating the bike is particularly useful for freeing the back wheel to perform gear indexing or make derailleur adjustments.
For home shops, I like the portable variety of repair stands so that you can keep them collapsed and out of the way when not in use. I really like Feedback Sports repair stand because it’s extremely stable and lightweight.
While you can find stands that are slightly more stable, they usually weight significantly more and can be trickier to set up.
You can find the Feedback Sports
A reliable work stand is the foundation of any home repair station, and the Feedback Sports Sport-Mechanic Work Stand offers aspiring home mechanics a durable blend of function and value! With a dependable tripod leg configuration that holds up to 65 pounds, the Sport-Mechanic Work Stand remains stable on flat or uneven surfaces and has an adjustable work height of 42 to 65 inches.
Spoke wrench
As the name implies, a spoke wrench is a nifty little tool for adjusting the tension of a wheel spoke. Spokes that are too loose or too tight can cause the rim to be out of alignment and the wheel to spin unevenly.
Adjusting the spoke tension is a process referred to as “truing” the wheel.
Most spoke wrenches come as a standalone size, so make sure to match your spoke wrench to the size (gauge) of your wheel spokes.
Speaking of spoke wrenches, if you’re curious about riding with a broken spoke, then make sure to take a look at my article here!
Chain-related maintenance tools
Chain tool
Without a dedicated tool, removing chain pins is a serious pain in the butt! Thankfully, this little tool takes all the sweat and frustration out of the process by allowing you to quickly crank it down and pop out the pin.
Depending on what speed chain that you’re using, you may need to get a specific chain tool to ensure that it fits properly.
Chain checker
As chains wear down over time they elongate, also referred to as “stretch”. Rather than simply guessing how much your chain is worn, this little tool allows you to get a much more exact measurement.
Technically, you can try to gauge the wear using a ruler, but a dedicated chain checker will be more precise.
Just how much the chain can stretch before it needs to be replaced depends on the chain speed. Bikes with eleven or more gears should have their chains replaced once they have stretched 0.5%.
If you’re running a 10-speed and down, then you can wait until it has reached 0.75% stretch.
Master link pliers
Even if your chain has a master link it can be tricky to remove by hand. Dirt, gunk, and corrosion can make it tricky even for regular needle nose pliers to get the job done.
Thankfully, master link pliers are specifically designed to make this process easy and straightforward. Most are compatible with any speed of chain that uses a master link.
Cassette-related maintenance tools
Cassette lockring tool
When it comes time to replace the cassette on your mountain bike you’re going to need a cassette lockring tool. This special tool helps loosen the nut that holds down the cassette lockring.
Since you should already have a decent adjustable wrench in your kit, get the lockring tool version that doesn’t have a handle. Doing so will save you money and space.
For a step-by-step guide, take a look at the dedicated article that I wrote on replacing a mountain bike cassette.
Chain whip
While you can certainly make a chain whip from an old chain and piece of wood, it’s a pretty inexpensive tool to purchase.
Chain whips allow you to securely hold the cassette or freewheel during maintenance.
Miscellaneous common repair tools
- Pedal wrench – For easy installation or removal of pedals it’s going to be worthwhile to purchase a pedal wrench. While it’s only a standard 15mm wrench, it has a super slim profile that makes performing the task much easier.
- Cable cutter – Your needle nose pliers may already have a cutting edge, but a dedicated pair of cable cutters will be a better long-term option. Compared to electrician cable cutters, they provide more cutting power and are better suited to tough cuts.
Bicycle specific cutters often come with additional crimping ends that make them even more useful. Here is a great pair of cable cutters from Park Tool at Amazon.com. - Screwdrivers – Just like dedicated hex wrenches, a decent set of standalone Flat and Phillips head screwdrivers are really handy to have for your shop. Better yet, they’re extremely affordable and you may already have them.
In addition to a set of tools to get started, there are many other things that new mountain bikers have to consider. For the full details, make sure to take a look at my article on “How To Start Mountain Biking“.
In addition to your maintenance tool kit, you’ll also want to consider some additional general accessories. I cover this in my dedicated article on the best mountain bike accessories.

