
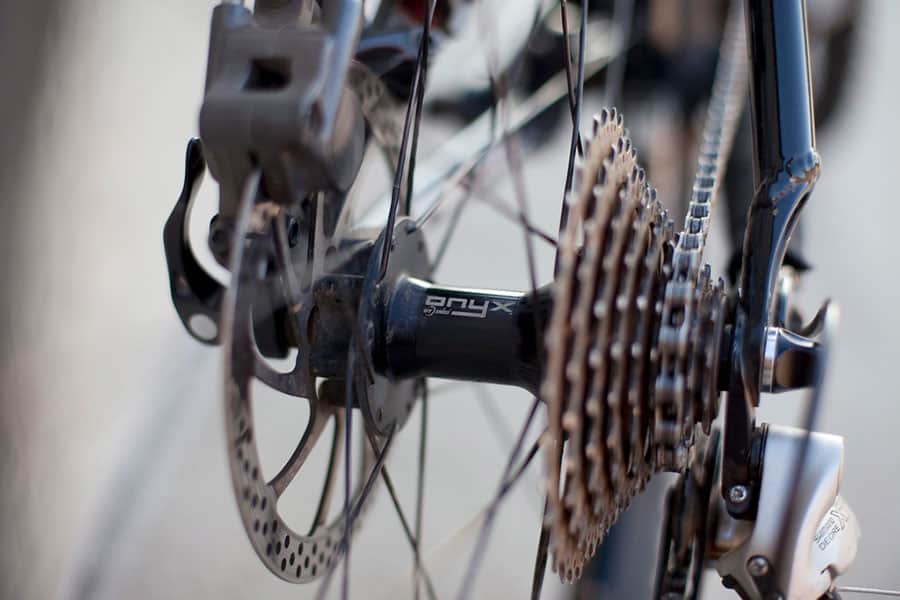
While the cassette on a mountain bike may look like a complicated device, replacing one is actually a pretty simple process. Learning how to replace the cassette will not only save you money but will keep you more in-tune with the workings of your bike and better able to fix issues as they do come up.
Before jumping straight into the step-by-step guide, let’s review some of the main reasons why you might need to replace your mountain bike’s cassette.
Table of Contents
Common reasons why you’d replace a cassette
- Cassettes simply wear out – Like any other part on a bike that articulates thousands of times, it’s eventually going to wear out and need to be replaced. While the time between replacement will vary for every rider, it’s worth keeping an eye on your cassette after about 1,000 miles of trail use.
If you notice worn down teeth, or gears that have trouble changing even with a new chain then it may be time to replace the cassette. - Adapting to the terrain – It’s likely that the cassette on your bike is optimized for the terrain where you ride. If you’re going to be traveling to somewhere new with totally different terrain, then it could be helpful to swap out your cassette for one with a different gear ratio.
One with wider or smaller ranges to accommodate very flat or very hills terrains are one such example. - Cleaning overhaul – In some cases it’s just not possible to get all of the dirt and grime out of your cassette while it’s mounted to the bike.
Removing the cassette can be extremely helpful to allow you to get the dirt, grime, and grit out of every nook and cranny.
Tools for replacing your mountain bike cassette
The best way to replace the cassette on your mountain bike will be using tools built specifically for the job.
While I’m sure you can find a way to get it done without them, it seems silly to risk ruining expensive parts by using the wrong tools.
- Cassette lockring tool
- Large adjustable crescent wrench
- Chain whip (a vice whip will work as well)
- Grease
- Degreaser
- Clean cloth or rag
- Disposable gloves
A step-by-step guide to replacing your mountain bike cassette
Note that these instructions are for replacing the cassette on a modern mountain bike that uses a freehub system. Older bikes used a freewheel system, which will have a slightly different process for replacing the cassette which is not covered in this article.
If all of this sounds like a foreign language to you, then check to see if the lockring (the piece holding down the cassette i.e. gears) has the word “lock” printed on it. If it does, you’ve got a freehub system!
1. Start by shifting the chain to the highest gear (smallest cog), and then removing the rear wheel using the quick-release or thru-axle. Be careful not to lose any of the springs if you have the quick-release style.
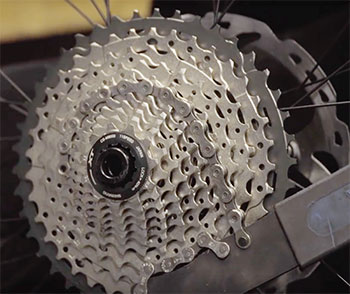
2. Set the rear tire down at your feet with the cassette facing away from you.
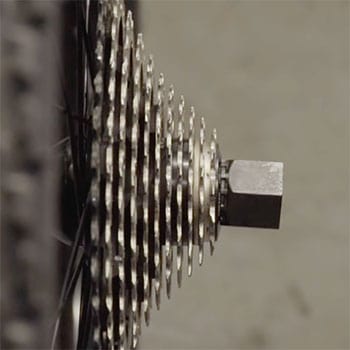
3. Use a chain or vice whip to hold the cassette in place (as shown below). Give the whip a small push to test that it’s nicely seated and not going to slip off.
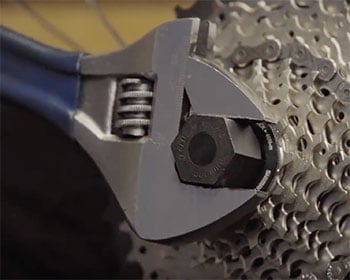
4. Insert the lockring tool and turn it counter-clockwise with an adjustable wrench to loosen the lockring. This should not require a tremendous amount of pressure to get it loosened.
5. Once the lockring has been loosened, you should be able to use your hand to loosen it until the cassette end comes off.
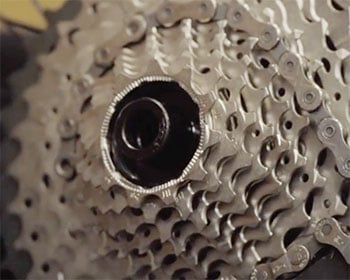
6. Once the cassette end is off, you can remove the chain or vice whip.
7. Remove the cogs and any spacers one at a time until they’re all off the bike. The first couple of cogs are usually independent, and then the remaining cassette should lift off together.
If it feels like any parts are stuck, try gently tap the cassette with the wrench to loosen them.
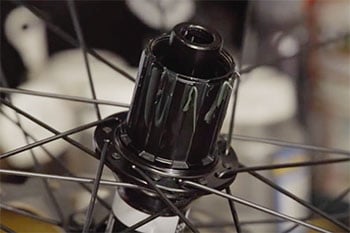
8. Lift the remaining cassette off the bike and place aside. Make sure to not pull the freehub off with it in the process.
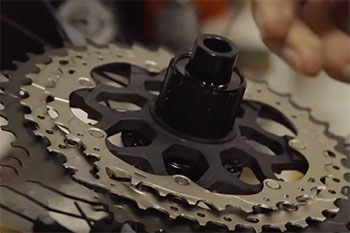
9. Use a rag and degreaser to remove any dirt and gunk from the freehub and cassette. Make sure not to get any inside the body of the freehub. It has internal grease that keeps it functioning well, and you don’t want the degreaser getting inside of it and breaking down the grease.
10. Apply a small amount of grease to the outside of the freehub to help the new cassette slide on smoothly and prevent it from seizing over time.
11. If your new cassette came with spacers to adapt it to a larger hub, insert those first.
12. With the new cassette, and working from the largest to the smallest cog, insert them back onto the freehub.
13. This will require that you align the thin spline of the freehub with the corresponding spline on each cog for proper alignment. They only go on one way, so don’t try to force them on.
14. Once complete, carefully thread the locknut back on by hand to ensure that the threads are not crossed.
15. Then tighten down using the lockring tool for a snug fit. Do not try to apply a superhuman amount of force when tightening it down – snug will do 🙂
Note: The chain or vice whip is not needed for tightening because you’re spinning it in the drive direction. The internal ratcheting mechanism of the freehub is what controls this directionality.
16. Visually confirm that the spacing between each of the cogs is the same.
17. Slot the tire back onto the end of the bike and re-attach the quick-release or thru-axle.
18. Thread the chain back onto the cassette and turn the pedal to spin the wheel and confirm that the gears shift normally.
Congratulations! You’ve just successfully replaced the cassette on your mountain bike!
In addition to the quick shift test, it won’t hurt to take the bike for a quick spin around the block to make sure that everything is working as expected before hitting the trail.
How much does it cost to replace a mountain bike cassette?
Like all mountain bike parts, there’s a wide range to the cost of the actual cassette. I did a quick survey of the two dozen most popular cassettes on JensonUSA and found an average price to be $75.16.
However, I also saw cassettes as low as $11.99 and as high as $379.99, so there was quite a range in price.
In addition to the cassette itself, you’ll either need to borrow tools from a friend or purchase some of your own for the cassette installation. Borrowing is free, but if you do have to buy the tools the cost isn’t too high.
While you can find very cheap cassette tool kits for around $15, it’s not likely that they will last very long.
You’ll be better served in the long run by purchasing higher quality tools that won’t break or wear out as easily. Aside from the cassette itself, you should be able to find all of the remaining items for around $50 – $60.
How long should a mountain bike cassette last?
The length of time that a cassette lasts can vary wildly from person to person. How well you maintain the bike, what kind of conditions you ride in, and your own particular riding style factor into the life expectancy of the cassette.
Once you have put around one thousand miles on the cassette, it’s time to start inspecting it for wear and tear. Take a particularly close look at the cogs for the gear which you use more.
If the teeth have become hooked and shark tooth-looking, then it’s a good sign that it’s time to replace them.
Another obvious sign that it’s time for a new cassette is if you’ve just replaced your chain but the gears are still skipping during shifts. This may not happen on every single shift, but keep an eye for it with the gars that you use the most.
If you don’t see these signs then you’re fine to keep riding with the cassette. Just make sure to keep both it and your chain in good condition to further extend the life of the cassette.
Know that when it does come time to replace the cassette you won’t be swapping out a single cog but more likely the entire assembly.
Individual replacement parts can be hard to come by, and at that point, you might as well future-proof the whole setup by replacing all of it.
Do you need to change the chain with the cassette as well?
As a general rule of thumb, rider’s go through two chains for every cassette. However, your particular style of riding and conditions may cause your chain to have a longer or shorter lifespan.
This average lifespan also assumes that you’ve done a decent job of maintaining your chain to avoid wearing down the cassette teeth faster than expected.
Unless something strange has happened, it’s probably worthwhile to just go ahead and replace your chain with your cassette. You’re already going to have the bike taken apart, so you might as well put in all fresh components.
Most chains cost $20-$30, so it makes good economic sense to replace this cheaper item more frequently to get more life out of your more expensive cassette.
Just make sure that your replacement chain is compatible with the new cassette and you’ll be back off to the races in no time 😉
Are Shimano and SRAM cassettes interchangeable?
Shimano and SRAM cassettes are interchangeable because the spacing between the sprockets is the same. Most cassettes made by SunRace and IRD will also be compatible with Shimano and SRAM.
Unfortunately, the same cannot be said for brands like Campagnolo and Mavic.
Make sure to also stick to the same number of sprockets i.e. speeds when switching cassettes to avoid potentially needing to replace the chain if it still has plenty of life left in it.
Shimano and SRAM 5 to 10-speed cassettes and chains are compatible, but if you’ve got an 11-speed drivetrain you’ll need to get both the chain and cassette from the same manufacturer.
What do cassette numbers mean?
There are several numbers that you’ll see listed for a cassette that is important to understand. Given the large range of terrains that you’ll encounter in mountain biking, the gear range is probably the most valuable.
On the cassette box pictured above, you will see several numbers across the bottom. 11-25, 11-28, 11-30, 12,25, and 12-27. The first number in each pair tells us how many teeth the smallest cog in the cassette has, while the second (larger) number represents the number of teeth in the largest cog.
Why does that matter? Well, the variety of gear sizes is what allows us to maintain a comfortable pedaling cadence while riding. For example, a steep climb would be very hard if you only had one gear to work with.
Thankfully, we can shift into one of the larger gears to make climbing easier. The same goes for a decent or flat area where you really want to get up to speed, you can switch into one of the smaller gears.
Mountain bikers will get the most out of a cassette which has a wide gear range to handle these varying scenarios.
The other key number on the box is the number of sprockets. The model from the photo above notes the “10s”, telling us that there are 10 different sized sprockets in the cassette. Keep in mind that this only represents part of your bike’s full gear range.
1x vs 2x drivetrains
If you’re running a 1×11, that means you have a single chainring on the front of the drivetrain. Referred to as a “one-by”, this style of the drivetrain has become very popular in the last several years.
The simplification means that you not only have one less shifter to work with but that the bike no longer needs a front derailleur since it only has a single gear. This means lower weight and fewer chances of failure or dropped chains.
To make up for the lost range by only having a single front chainring, most one-bys use cassettes with expanded ranges. For example, my bike uses an 11-42 cassette. However, you can find some as wide as 11-46 and 10-51.
As you may have already guessed, bike’s that denote a 2×10 drivetrain have 2 chainrings up front, with 10 in the back. The advantage of a two-by is that it offers a wider gear range with smaller jumps between them.
The downside comes with the added weight, the potential for more component failures, and added cost of front derailleur when the time comes to replace it.
If you found this article helpful, make sure to take a look at some of my other related articles below!