
If you’ve spent any time at all mountain biking then you know just how dirty the chain can get! While you can certainly take it into the bike shop for cleaning and maintenance, cleaning a bike chain is a very simple process that you can easily do at home.
Not only will cleaning your own chain save you money in the short term, but it will allow you to extend the lifetime of both your chain and drivetrain with more frequent cleanings.
Why mountain bike chains need to be cleaned
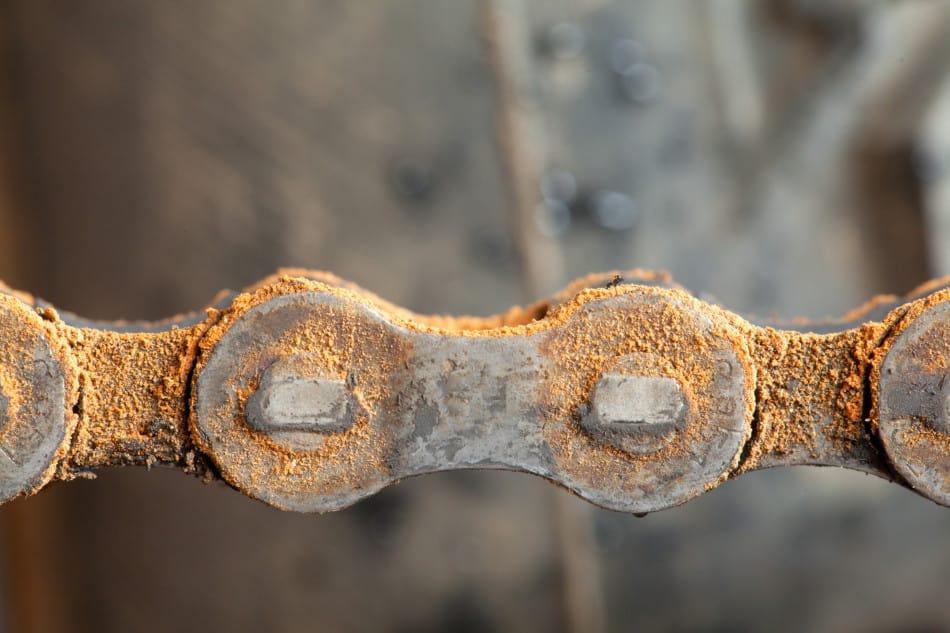
Your bike’s chain and drivetrain are the equivalents of the transmission in your car. They transfer all of the power from your feet to your bike’s wheels. Unfortunately, they pick up a lot of dirt, gunk, and grime in the process. And that’s bad news for their performance and longevity!
As dirt accumulates on the chain, it works its way into all of the tiny crevices and increases friction between the chain links. Not only does the increased friction slow you down, but it accelerates the wear of your chain.
Ever hear of the term “chain stretch“? Well, it’s not that the chain is actually stretching, but from components have worn down and allowed the chain to elongate.
In addition to the wear, it also prevents the chain links from moving smoothly through the derailleur and cogs. Further limiting your ability to efficiently transfer power from the pedals to the wheels.
As a dirty chain passes through these components, it also deposits the dirt and gunk on them as well. Thereby accelerating their rate of wear as well.
Last but not least, a dirty chain isn’t going to make for smooth shifting. Once again robbing you of efficiency in your ride.
3 Simple ways to clean your mountain bike chain
Cleaning bike chains is a mixture of art and science in the mountain biking community. While there’s no limit to the variety of techniques that can be used, I’ll cover three simple approaches that you can use to clean your bike chain at home.
Keep in mind that you’ll want to do some basic preparation before starting any of these cleaning methods to prevent your flooring e.g. carpet from being ruined in the process.
Performing the cleaning in a garage or outside is always preferred. If that’s not an option you can always lay down a drop cloth or something else to prevent the floor from getting dirty.
Because you’re reading this article I’ll assume that this is your first time cleaning your own chain and may not have the right cleaning supplies.
While general use products might work, bike-specific cleaning supplies cost about the same and formulated specifically for bike care. There’s really no downside to using them in my opinion.
To save you time and guesswork, I’ve provided Amazon links for many of these products as they’re mentioned in the supplies sections below.
Mountain bike chain cleaning method #1 – The Basic Clean
Estimated cleaning time – 5 minutes
Think of the basic clean as the bare minimum needed to keep your chain clean and in a good functioning state.
The beauty of this cleaning approach is that it’s very easy, requires minimal time or tools, and can be performed without needing to take the chain off the bike.
If you’re diligent with your chain cleaning, it will likely also be the only one that you’ll ever need to use!
Supplies you’ll need:
Steps to clean:
- While slowly backpedaling, apply one drop of lube to each link (roller) in the chain until the entire chain has been coated.
- Let the bike sit for a couple of minutes so that the lube can work its way into the crevices of each link.
- Fold your clean cloth in half a few times to create a nice cushion, then hold it against your chain while slowly backpedaling.
- Cycle the chain through several rotations, then change the angle from which the cloth is pressing into the chain and repeat.
- Repeat this until the gunk has been wiped off all sides of the chain and any excess lube is removed.
Voila, you’re done!
It’s best to perform this clean and re-lube process the night before a ride so that the lube has time to set up. However, if you’re in a pinch, just do your best to get the excess lube off the chain before hitting the trail.
Use this method on a frequent basis to prevent the dirt from accumulating too much. Every couple of rides usually does the trick.
The high frequency is what allows us to get away with not using a full-blown degreaser (cleaning agent).
Mountain bike chain cleaning method #2 – The Enhanced Clean
Estimated cleaning time – 20 minutes
Now that you understand the basic clean it’s time to take things up a level. The basic is great clean for its quick, no-frills approach.
However, if you’ve gone too long between cleanings or just gotten your bike really dirty, then you’ll need to put in a little bit more work to get it clean again.
The good news is that this approach still allows you to perform the cleaning without removing the chain. Less work and more results is always a good thing 🙂
Supplies you’ll need:
- 2 Firm brushes (old toothbrushes can work as well)
- Bicycle chain degreaser (Simple Green, Finish Line, and White Lightning are all great options)
- Hose or bucket of water
- Soap
- Chain lube
- Clean cloth or rag
- Disposable gloves (optional but highly recommended)
Steps to clean:
- If your entire bike isn’t that dirty and it’s really just the chain that needs some love, then skip straight to the second step.
- Otherwise, take the time to use a hose, brush, and soap to get the worst of the mud and grit off your bike before cleaning your chain. You’d just be wasting your time if dirt from the bike drops right back onto your clean chain!
- Otherwise, take the time to use a hose, brush, and soap to get the worst of the mud and grit off your bike before cleaning your chain. You’d just be wasting your time if dirt from the bike drops right back onto your clean chain!
- If you have them, put on gloves to protect your hands.
- Begin by applying degreaser to your brush and then use the brush to paint degreaser onto the chain.
- Once this has been done, push the brush bristles against the chain and backpedal the chain to cycle it through the brush several times.
- Do this while pressing the brush into the chain from multiple angles to knock all of the gunk off.
- Apply more degreaser to the brush, then spend a few minutes scrubbing the cassette, derailleur, and chainrings to remove any build-up in these areas. Backpedaling the chain while scrubbing these components will help to speed up the process.
- Use soap, water, and the clean brush to wash any remaining degreaser off all of the components. You want to ensure that the degreaser is completely removed before re-applying chain lube.
- Allow the bike to sit until dry, or speed up the drying process using compressed air or dry rags.
- Once the bike is dry, apply one drop of lube to each link (roller) in the chain while backpedaling until the entire chain has been coated.
- Use a clean cloth to wipe away any excess lube by cycling the chain through the cloth.
As you can see, this process was a little more intensive due to the additional step of using the degreaser to remove the gunk and grit caked onto the chain.
The good news is that this type of cleaning is not necessary on a frequent basis. Save it for when the chain gets really dirty.
Note: It’s very important to ensure that you have removed all of the degreaser from the chain and components before re-applying the lube. Failing to do so will prevent the lube from properly setting, and providing the full lubrication benefits.
Twist on the ‘Enhanced Clean’
If you’d like to stay a bit cleaner during the chain cleaning process, there are also really convenient hand-held chain cleaning machines. You start by threading the chain through the cleaner, then filling it with degreaser.
Backpedaling the chain pulls it past brushes inside the cleaner resulting in a bright, shiny, and clean chain. These are really efficient and can be a little less messy than the traditional brush route.
Park Tool makes a fantastic kit that comes not only with the chain scrubber but also an included chain brush and bottle of degreaser. While there is also a pro version of this tool, it’s probably overkill for personal home use.
Save yourself a few bucks and grab the model that I linked below.
For a visual reference, here’s a video from the Park team themselves demonstrating the device in action!
Mountain bike chain cleaning method #3 – The Deep Clean
Estimated cleaning time – 30 minutes
As long as you keep up with regular chain cleaning it’s unlikely that you’ll truly need to perform a deep clean.
However, if you let things get out of hand or just want to do a really thorough annual cleaning then this is the approach to use.
This time, you’ll need to actually remove the chain from the bike. So make sure that you’ve got either a master link on your chain or chain splitter to get it off.
Most bike shops will charge around $15 to add a master link if your chain doesn’t already have one to make the process easier going forward.
Supplies you’ll need:
- Firm brush (old toothbrushes can work as well)
- Bicycle chain degreaser (Simple Green, Finish Line, and White Lightning are all great options)
- Bucket, tub, or old water bottle for soaking
- Hose or bucket of water
- Soap
- Chain lube
- Clean cloth or rag
- Gloves (optional but highly recommended)
Steps to clean:
- Take the chain off the bike.
- Place the chain into your bucket or soaking tub and add enough chain degreaser to cover the chain.
- Leave the chain to soak overnight.
- After the chain has soaked, use a brush to scrub off any remaining dirt and grime (gloves recommended).
- While not required, it’s definitely recommended that you also spend some time also brushing the cassette, derailleur, and chainrings with a degreaser soaked brush to remove any build-up in these areas.
- Rinse off the chain (and any other components cleaned) with soapy water to remove any remaining degreaser.
- Allow the chain to sit until dry, or speed up the process using compressed air or dry rags to speed up the process.
- Once the chain is dry, re-install it on your mountain bike.
- Lubricate the chain by applying one drop of lube to each link (roller) in the chain while backpedaling until the entire chain has been coated.
- Use a clean cloth to wipe away any excess lube by cycling the chain through the cloth.
Due to the chain removal and re-installation, this approach takes the longest of the three. However, the scrubbing effort is usually pretty minimal thanks to the long soak in the degreaser.
This type of cleaning should be very infrequently needed if you’re already keeping your chain reasonably clean.
What is the best chain lube for mountain bikes?
Mountain bike chain lube selection: Wet vs Dry lube
The “best” chain lube for your mountain bike will be dependent on the conditions and environment that you will be riding in. All lubes basically fall into two different categories, wet and dry.
Wet lubes can be used in all conditions but are particularly good at repelling water. For fall and winter riding where you’re more likely to encounter rain, puddles, etc… this is the perfect time to go with a wet lube.
Also, if you expect creek or river crossings to be a regular occurrence then it’s probably worth going with a wet lube as well. They’re also great at helping to prevent corrosion from salt, so if you’re near the ocean or the roads have been salted then it would be a good choice.
The downside to wet lubes is that because of their wet nature they tend to pick up more dirt and gunk. This becomes more of an issue in dry or desert environments.
Dry lubes are best suited to dry and dusty climates because they attract less dirt, therefore causing less build-up. Some dry lubes are essentially a wax that has been dissolved in a solvent to allow for easy coating on the chain.
Others use synthetic polymers that when dry form a wax-like coating on the chain. Dry lubes are more commonly used in the spring and summer seasons, or if you’ll be riding in a dry, desert-like environment.
The downside to dry lubes is that their lubrication effects are shorter lived compared to wet lubes. While they’re certainly easy to apply, you’ll need to lubricate your chain more often compared to using a wet lube.
The good news is that there really isn’t really a “wrong” choice here. As long as you make sure to regularly clean and lubricate your mountain bike chain things will work out just fine 😉
Recommended mountain bike chain lubes
Now that you up to speed on the basic differences between the two options, let’s take a look at some of the best available chain lubes for mountain bikes.
Top Wet Lubes
- Finish Line Wet Bicycle Chain Lube – This product uses high viscosity synthetic oils that excel at repelling water in the wettest conditions.
- White Lightning Epic Ride All Conditions – Another popular synthetic oil that excels in a variety of conditions.
- Tri-Flow Superior Lubricant Drip Bottle – A high-grade petroleum oil that performs even in extreme temperatures and humidity.
Top Dry Lubes
- Finish Line Dry Teflon Bicycle Chain Lube – This synthetic lube performs extremely well for dry off-roading, and does a pretty darn good job in wet conditions as well.
- Squirt Long Lasting Dry Lube – Squirt’s claim to fame is that once you’ve got a good base layer in place, subsequent applications require very little to no cleaning or degreasing! The key to getting good performance out of it is to ensure that any pre-existing lube on the chain is removed with a degreaser prior to applying Squirt.
- Muc Off Bio Dry Lube – If you want a great chain lube that’s also biodegradable then Muc Off may be the one for you! This wax-based formula is very durable and has a pipette system for easy application that helps to prevent messes from occurring during application.
Is it OK to use WD-40 on a bike chain?
If you’re out of chain degreaser, then you can use WD-40 for the degreasing portion of your chain cleaning. While many people think if WD-40 as a lubricant, it’s actually primarily a degreaser with light lubrication properties.
This is what makes it ideal for loosening up seized parts like a door hinge. The degreaser cuts through the gunk build-up, and the light lubricant helps to get parts sliding again.
While this works just fine for items that aren’t exposed to the elements or articulating several hundred times per use, it’s not a good fit for your bike chain from a lubrication standpoint.
The lubricant is not thick enough to properly protect your chain and drivetrain from the heavy use that comes with riding.
If you do end up using WD-40 for cleaning your chain, make sure to properly clean it afterward to remove all of the solvents. Then once the chain has dried, you can follow-up with a bike-specific lube to protect the chain.
Of course, this all assumes ideal conditions. If you’re in a pinch and WD-40 is the thing on hand – then I’d argue that it’s certainly better than nothing!
If you’re just a lover of WD-40, they also make a bike-specific version that would be worthwhile to look into.