
With all of the choices that you can make to customize your mountain bike, choosing the right MT handlebar width might be one of the most important! The handlebars are one of your main connections to your bike and are responsible for your steering and agility. This makes choosing the proper width and setup all the more important.
So, how should you choose your mtb handlebar width?
The proper handlebar width for mountain bikes is determined by your primary riding discipline, personal preferences, and body type. Most riders find that 760 mm wide handlebars are the perfect width for a variety of uses.
While 760 mm seems to be a good middle-ground width for modern mountain bike handlebars, there are pros and cons to both wider and narrower variations. In addition, other factors like the handlebar sweep, rise, and stem length can play major factors in finding the perfect handlebar setup for you.
Breaking down the Pros and Cons of Handlebar Width
While I believe that 760 mm is a great starting point for picking your handlebar width, there are benefits and downsides to going even longer or shorter.
Let’s take a look at these benefits and downsides so that we can understand how to best adapt our handlebar length to our riding discipline.
Benefits of wider bars:
- Provide more steering leverage in corners
- Feel more stable in downhill sections
- Better maneuvering when going over obstacles
- Can lead to increased confidence while riding
Downsides of wider bars:
- Can feel sluggish in tight sections
- Make for tricky passage on narrow trails where there are concerns of clipping trees or getting caught on other obstacles
Benefits of narrow bars:
- Better suited to longer stem lengths which allow you to get your weight more forward
- Allows for a better feel for the front wheel because the hands are closer to it
- Enhanced aerodynamics and positioning for cross-country riders
Downsides of narrow bars:
- Feels less stable for the rider
- Steering is not as responsive
- Not as much leverage in turns
Matching Handlebar Width to Your Riding Discipline
Now that you’ve got a good understanding of how handlebar width can affect bike handling, it should make more sense to see why certain disciplines go longer or shorter.
Keep in mind that these are just general statements for handlebar width based on the discipline. Personal preference and body type will still have an influence, as we’ll be covering shortly.
Handlebar width for Downhill riders
Most downhill riders prefer a more upright stance that provides a maximum amount of control. While 780 mm could be considered a starting handlebar width for downhill riders, many are using handlebars in the 800 – 820 mm range.
These wider bars open up the chest and body profile to create the most stable platform for attacking a downhill wide. Quick adjustments and maximum leverage are incredibly important in swift descents and sharp turns.
Handlebar width for Cross-Country (XC) riders
Cross-country riders sit on the opposite end of the spectrum from downhill riders. They require less fine-tuned maneuvering and instead benefit from having a more aerodynamic profile.
The shoulders and chest are closed down by bringing the hands in closer to create less drag and wind resistance.
XC handlebars are generally seen as anything less than 760 mm. Just how narrow you go here depends on your preference and body type. However, a good starting point may be around 740 mm, and you can test narrower grips from there to see what works best for you.
It’s not often that many people are riding less than 720 or 700 mm on modern bikes these days. Not impossible, just not often 😉
Handlebar width for All Other riders
Now that I’ve covered the two extremes of cross-country and downhill, almost all other riding disciplines will find that a handlebar width in the 760 – 780 mm range will best suit them.
Naturally, this will again be heavily influenced by your personal preferences and body type, but this should act as a good general starting point.
This is the happy “middle-ground” range that seems to suit most people who are more generalist riders enjoying a variety of terrains.
In the event that you find these bars too wide, you can always cut down the bars to accommodate the preferred narrower grip.
Additional Factors Affecting Handlebar Width
As I have mentioned several times, these are simply common ranges that many riders in the respective disciplines use. You can absolutely still find good riders who fall outside the norm because they’ve figured out what works best for them.
For example, you could absolutely find downhill riders using 760 mm handlebars.
Body type plays a large factor in this process of figuring out the right width. If you’re a shorter individual with narrow shoulders or short arms, then you’ll probably find yourself using handlebars that are slightly narrower than previously recommended.
Likewise, larger riders with wider shoulders or longer arms may find that they need to go wider.
Your own riding background will also play into the matter. If you spent years in road cycling, you will likely prefer narrower bars.
Whereas riders coming from motocross may find that they prefer wider handlebars regardless of their body type.
But wait – there’s more! Handlebar Rise, Sweep, and Diameter
In addition to your body type and personal preferences, your handlebars’ rise, sweep, and diameter also factor into comfort.
Sweep refers to how far back and up the handlebars travel. While once again a matter of personal preference, most downhill riders use handlebars with more sweep than cross-country riders. Sweep comes in two varieties – upsweep and backsweep.
As the name implies, upsweep refers to the angle of the bar upwards. Measured in degrees, you’ll find bars with common measurements like 5 or 6 degrees of upsweep.
Backsweep refers to the travel of the bars back toward the rider. This helps to create a more comfortable wrist position but isn’t always preferred by aggressive riders because it causes the elbows to drop.
Common sweep measurements are in the range of 8 or 9 degrees backsweep.
Rise is another factor that plays into handlebar comfort. It refers to how much the bar travels upwards from the clamp area to the hands. Many cross-country riders use handlebars with no rise, whereas downhillers tend to like more rise.
Measurements for rise come in a variety of ranges, including 10, 15, 20, 30, and even 38 mm.
In addition to discipline-specific uses, rise can provide ergonomic benefits by allowing a more upright riding position and lessening the strain on the wrists and back.
Last but not least, stem length is another key factor to consider when selecting your mountain bike handlebar width. Like handlebar width, stem length plays a key factor in the bike’s handling.
As a general rule, the wider the handlebar, the shorter the stem should be.
Because this is such an important topic, I wrote an entire article on the specifics of stem length and how it affects handling. You can find that article here.
How to Judge the Right Handlebar Width for You
The best method for finding the right handlebar width for you will be to spend more time on the bike!
Try moving your grips and other controls in and out to test what width feels best to you before making the choice to buy a new set or cut down your current one.
Aside from spending time testing on the bike, you can also do a simple pushup test to see where you feel the strongest and most stable.
- Assume a pushup position on the ground with your feet tight together. It’s extremely important that your feet are together and not apart. This creates a narrow base to better help you judge stability from the hands alone.
- Pick a position where your hands feel comfortable, and try performing a few pushups.
- Now, move your hands out a little wider and re-test with a couple of pushups. Do you feel stronger or more stable? If so, that’s a good sign that this width is better than your original.
- Test moving your hands out a little further and re-test the pushup. Continue repeating this process until you find the most stable position.
- Note that if you felt weaker after first moving your hands out in step 3, then you should also try testing narrower versions to find the best one for you.
- Once you’ve found the most stable position, take note of where the outside edges of your hands (pinkie fingers) are at. Have a friend mark them off if need be.
- Use a tape measure to measure the distance between these two marks to find a decent starting point for your handlebar width.
Use this measure to compare to your current handlebar width, and move the grips and controls accordingly to test the setup on the bike before making any changes that can’t be reversed i.e., cutting them down.
How to Cut Down Mountain Bike Handlebars
Once you’ve spent time testing different handlebar widths by shifting your grips, it’s time to make the change permanent.
If your ideal grip width is wider than your current set, you will have to invest in a new pair!
While you can always take them into your local bike shop to have the handlebars cut down, it’s a pretty straightforward process that most are able to handle on their own. However, if the current (or new) ones need to be cut down, here are the steps to follow.
Keep in mind that cutting down your handlebars (carbon or metal) is 100% irreversible!
So make sure that you’re certain which width you want before making any cuts. You may even want to add an extra 10 mm to your “ideal” width to provide yourself with a little wiggle room for error.
It can also help to have a friend on hand to help steady the bike during the cutting process. You can remove the bars completely during cutting, or take them off if you prefer. I think it’s easier and faster to leave them on the bike, but it’s up to you.
Process for cutting metal handlebars (Aluminum, Titanium, Steel)
- Take note of your current control setup before making any cuts so you can reference them later. A quick snapshot with your phone’s camera is a good idea.
- Pick one side to start on and remove the grip from the handlebars.
- Loosen the brake and shift levers and dropper post remote (if you have one) and slide them either towards the center of the handlebars so they’re out of the way.
- With a tape measure or caliper, measure in from the end half of how much you want to cut off and mark it.
- For example, if you currently have 800 mm handlebars and want them to be 760 mm, then you need to cut off a total of 40 mm. This means that you’ll be cutting 20 mm off each side.
- For example, if you currently have 800 mm handlebars and want them to be 760 mm, then you need to cut off a total of 40 mm. This means that you’ll be cutting 20 mm off each side.
- Use a hacksaw with a fresh metal-cutting blade to carefully cut off the marked end portion. Using a fresh blade that’s sharp and does not have worn down or missing teeth is important. Go slowly to ensure a clean straight cut.
- Use a file to smooth out the rough cut edges, and dump out any material that may have fallen inside the handlebars during cutting.
- Re-assemble the brake and shift levers, dropper post remote, and grips to the freshly cut side.
- Switch to the uncut side and repeat the steps to remove the components, measure, cut, and re-assemble.
Process for cutting carbon handlebars
- Take note of your current control setup before making any cuts so you can reference them later. A quick snapshot with your phone’s camera is a good idea.
- Pick one side to start on and remove the grip from the handlebars.
- Loosen the brake and shift levers and dropper post remote (if you have one) and slide them either towards the center of the handlebars so they’re out of the way.
- With a tape measure or caliper, measure in from the end half of how much you want to cut off and mark it.
- For example, if you currently have 800 mm handlebars and want them to be 760 mm, then you need to cut off a total of 40 mm. This means that you’ll be cutting 20 mm off each side.
- For example, if you currently have 800 mm handlebars and want them to be 760 mm, then you need to cut off a total of 40 mm. This means that you’ll be cutting 20 mm off each side.
- Use a hacksaw with a fresh metal-cutting blade to carefully cut off the marked end portion. Using a fresh blade that’s sharp and does not have worn down or missing teeth is important.
- Make sure to use a 32-TPI fine-tooth blade or a carbon-specific cutting blade (link to a good one on Amazon.com) when cutting carbon handlebars.
- Make sure to use a 32-TPI fine-tooth blade or a carbon-specific cutting blade (link to a good one on Amazon.com) when cutting carbon handlebars.
- While cutting, use a spray bottle with soapy water or Windex to spray the cutting area to prevent carbon dust from filling the air. Go slowly to ensure a clean straight cut.
- Use sandpaper to smooth out the rough cut edges, and dump out any material that may have fallen inside the handlebars during cutting.
- Re-assemble the brake and shift levers, dropper post remote, and grips to the freshly cut side.
- Switch to the uncut side and repeat the steps to remove the components, measure, cut, and re-assemble.
How do you Measure the Width of Mountain Bike Handlebars?
If your current handlebars are too narrow and you want to purchase a new set, then it’s a good idea to know exactly how wide your current ones are for reference.
Going from 720 mm to 800 mm would be a huge jump, so it’s best to have some frame of reference when making the switch.
As I’ve already covered, you can always cut down a set of new handlebars, but if you can purchase the correct width, you’ll save yourself a little work.
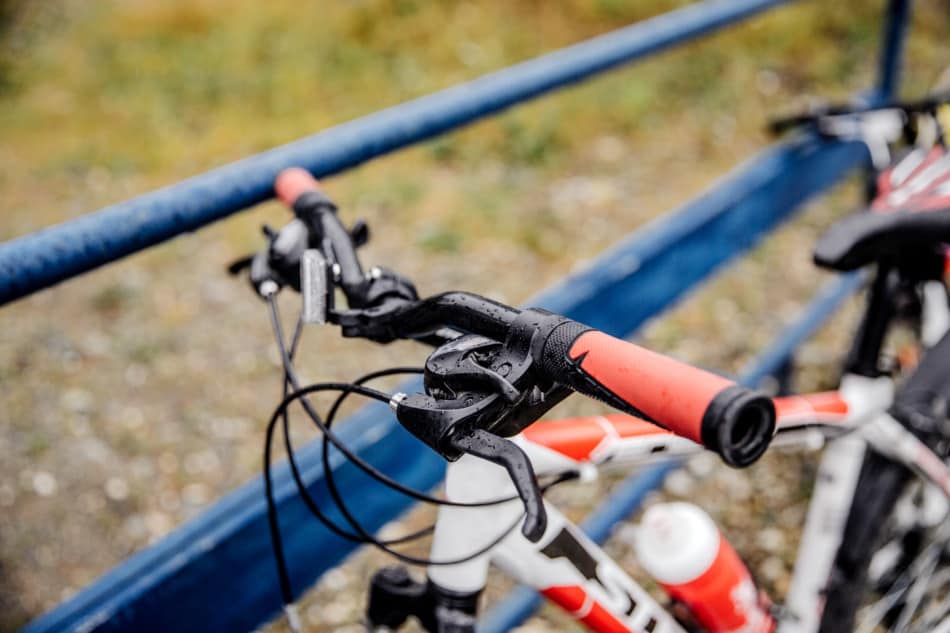
Grab a tape measure and measure the precise length from tip to tip of the handlebar. This measurement should be in a straight line and not follow any bends of the handlebars.
Make sure to convert any measurements into millimeters instead of inches or centimeters. See the picture below for reference.

The Evolution of Mountain Bike Handlebar Width
If you’ve been around mountain biking for a while, then you know what a radical change it has been when it comes to handlebar width.
Because mountain biking evolved from road bikes, they initially borrowed a lot of bike design concepts.
Amongst other things, this included narrow handlebars. Even as little as ten years ago, it wasn’t uncommon for mountain bikes to have much longer stems and shorter bars. While it seems crazy today, many of these bikes were running with 680 mm wide handlebars!
Over time, mountain bikers figured out how to gradually adapt their bikes for better performance off-road.
These included changes like more upright riding positions, slacker head tube angles, shorter stems, and wider handlebars.
In essence, they started to look more like a motocross bike than a road bike!
MTB Handlebar Width: FAQs
How wide should MTB handlebars be?
The width of MTB (mountain bike) handlebars depends on factors such as rider preference, riding style, and trail conditions.
Generally, handlebars in the range of 740mm to 800mm are commonly used, but it is important to consider factors like body proportions, maneuverability, and personal comfort when choosing the optimal width.
Is 780mm handlebar too wide?
Whether a 780mm handlebar is too wide depends on individual preferences and the type of riding. Some riders may find wider handlebars provide increased stability and control, especially in downhill or aggressive trail riding.
However, riders with narrower shoulders or those seeking more maneuverability on tight trails may prefer narrower handlebars.
Are wider handlebars more comfortable?
The comfort of handlebars depends on various factors beyond width, such as shape, sweep, and padding. While wider handlebars can offer better leverage and control, comfort is subjective and can vary between riders.
When evaluating handlebar comfort, it is important to consider personal preferences, bike fit, and ergonomic factors.
Are narrow or wide MTB handlebars better?
The choice between narrow or wide MTB handlebars depends on riding style, trail conditions, and personal preference. Narrower handlebars can offer better maneuverability in tight spaces and may be preferred by riders seeking more agility.
Wider handlebars can provide improved stability and control, especially in rough terrain or high-speed descents.
How should MTB handlebars be positioned?
The positioning of MTB handlebars depends on individual comfort and riding style. Handlebars are typically positioned parallel to the ground or angled slightly upward for a more neutral wrist position.
It is important to experiment with different positions, such as adjusting the stem length or rotating the handlebars, to find the setup that suits your comfort and performance needs.